Hammock Camping Guide
A Personal & Opinionated Account
Richard Rathe, March 2025 (How_To, Reviews)
For the height of this sort of deliciousness is to have nothing but the blanket between you and your snugness and the cold of the outer air.- Herman Melville (Moby Dick, Chapter 11)

These are the major attributes I'm looking for when I camp in a hammock:
- Durability - general quality of materials, design, fit, & finish
- Simplicity - easy to setup, configure, & take down; lightweight
- Versatility - able to adapt to varying situations
- Reliability - works every time without hassles
- Comfort - can you get a good night's sleep in it?!
Hammock Configurations
There are various configurations of camping hammocks that I'll outline below. Most are gathered
with single tie-on points at each end. Some have integrated bug nets. Complete packages come with both nets & rainflies. After a brief survey of the different types, I go on to propose my criteria for the Ideal Hammock
.
Staked Out

These gathered-end hammocks require two or more lines staked out on the sides for normal use. Many camping hammocks fall into this category. The hammock shown above collapses without lines pulling out the ears
on each side (orange arrow). You can still sleep in it (I have on a few occasions) but the netting droops and the little gear pockets become hard to use.
Most high-end camping hammocks have a ridge line (as seen above). Two of the hammocks I own do not. Hammocks that have a ridge line are easier to hang because you don't need to guess about the tension.
Single Pole (Spreader)

These hammocks have a flexible pole or spreader
at the shoulders. They can be pitched without additional staked-out lines. The extra weight is minimal. This is my preferred configuration. (Also note the lack of a ridge line in the example above.) One disadvantage is they can be easily tipped over by the wind when they are empty.
Double Pole (Suspended Tent)
![Double Pole Hammock [source:rivenlo]](images/double-pole.png)
Next there are hammocks with poles at both ends. They can be easily converted to small tents on the ground. They generally have barrel-shaped rainflies that are supported by the poles. They are heavier and air circulation could become a problem due to the closer fit of the fly.
Bridge (Crossbar)
![Bridge Hammock [source:eaglesnestoutfitters]](images/crossbar.jpg)
These hammocks have ends that are kept spread by stout crossbars called bridges
.
The model shown here is light enough to use on a backpacking trip. Many others are much heavier. The lie
in this type of hammock—when pitched properly—is flatter and more like a bed. It is also easier to use a conventional pad for insulation. There is no need for side lines (as noted above), but this style can also flip over when empty.
Tensioned
![Tensioned Platform Hammock [source:dailymail.co.uk]](images/tensioned.jpg)
Sometimes called tentsile
, these are more suspended platforms than true hammocks. They rely on heavy straps under tension provided by metal ratchets. Some are triangular requiring trees to be in just the right places. All are heavy and not really relevant to this discussion.
The Ideal Hammock
In a word—Simplicity should rule in most cases. I was lucky to find this inexpensive model for my introduction to serious hammock camping. It came with a short, curved tent pole to spread the shoulders and keep the net away from my face and arms. I thought this was obvious and normal, but alas it seems to be the exception. 🙁

The beauty of having this little bit of solid structure is you don't have to stake out the hammock on the sides. This is brilliant (again very obvious to me) because there are no lines to trip over! Why would you want things otherwise?

Some hammocks have an absurd number of lines IMO. The fly in the photo above has eight lines! The netting examples below have four or more lines before we even get to the fly!! I quickly discovered that the netting and fly should be attached to the main straps (so you don't have to round the tree a second time). Exactly how this works will vary depending on the hammock design.

The classic rainfly for a hammock is diamond shaped, with the diagonal seam serving as the ridge. The major concern is it must overlap the ends of the hammock by at least a foot or so. If your fly is sized correctly, this is only an issue with short hang
situations (see below). I discovered over time that my first hammock's fly was the ridge line! By adding a small loop at one end I was able to ease
the fly down to the side when it was not needed. I recently added an actual ridge line to this hammock but have not had a chance to try it in the field.
Higher quality rainflies and tarps will have what is called a catenary cut
. The edges between suspension points will be curved rather than a straight line. This can help prevent flapping in the wind.
Four Point Suspension Rule
To summarize the all of the above, I propose a Four Point Suspension Rule for hammocks:
In fair weather, the hammock (and optional bug net) should hang from two points.
When needed, the rainfly can be quickly deployed using another two points.
The fly attachment points might be stakes in the ground, rocks, or ropes around nearby trees. Additional lines may be needed for special situations, but also add complexity and take more time to setup and takedown.

I can't emphasize enough how big a difference this makes when using a hammock under real-world conditions. My goal is always to sleep out under the stars
weather permitting. The caveat is you have to be ready for unexpected precipitation. If I'm concerned about the overnight weather I'll pitch the rainfly (placing any stakes or ropes that are needed) and then do my best to ease it out of the way.
Packing Up
A final point about packing up in the morning. Old school hammocks were configured to use snakeskins
or sleeves to quickly pack/unpack the hammock and fly. Only my first hammock came with these.

As you can see above, the entire tent (hammock, netting, & fly!) are packed up and ready to detach from the straps. (This is similar to reefing the sails on a sailboat.) The skins are made of light, waterproof material so it keeps the entire package dry if it's raining. Because the fly is the ridge line
on this tent, you can hang it up, pull back the skins, and have a rain proof work area within seconds! This is a non-trivial feature that all of my other hammocks lack. 🙁
I'll note here that keeping dry while setting up a traditional backpacking tent is almost impossible. The first thing you have to do is spread the groundcloth and/or the tent on the ground—where there is maximal exposure to the elements! The rain protection is usually the last thing you put in place. (There may be exceptions, but this is generally true.)
Special Considerations & Tips
Be Kind to the Trees and Foliage
Use straps—not rope!—to wrap around trees. Properly deployed straps do not damage trees. Try not to break things. Your goal should be to leave as little evidence of your presense as possible.
There Are Never Enough Pockets!
Don't get me started… NONE of my hammocks have enough pockets, or pockets in the right places. 🙁 I'm slowly adding or moving pockets as my sewing skills allow.
Sleep on the Diagonal (If You Can)
It is a general rule-of-thumb to sleep slightly off-axis, with your head one way and your feet the other. This flattens the hammock and makes it more like a bed. It works even for small angles—as little as 5° will help! Unfortunately you can't always achieve this if the hammock is too short or hung too tight.
Feet Slightly Higher
The general instruction you'll see repeated everywhere is hang your hammock with with the straps at a 30° angle. This is generally true but misses a few subtle points. First, you don't really need to think about the angle if you have a ridge line. Pull the ridge line tight and you're there! Second, a gathered-end hammock should be pitched with the foot slightly higher than the head. If you don't do this you will probably slide down to the foot of the hammock while you sleep.

Adjustments
You should always adjust your hang to best address your situation. On a windy, rainy day it may make a difference whether you sleep with your feet, head, or side facing the wind. You may need to pitch the fly lower on one side, or add extra lines. Sometimes a water bottle or a rock is all you need to anchor a line. Always carry extra rope!


Modifications
Every hammock I've owned has had flaws, up to and including mistakes in manufacturing. In other cases the flaws are just failures of design. Keep this in mind and don't hesitate to make changes when necessary. Don't be afraid to try things and move on if they don't work out.
Elastic shock cord is your friend. Many problems are fixable with imagination and a little bit of shock cord. There are also problems created by manufacturers using elastic where it should not be used.
As a broad category I think most rainflies should be staked out with a loop of shock cord. This solves the problem of the fly sagging when you put your weight in the hammock. I like to use 12 inch tarp tie-downs (I call them toggles) as a ready source of inexpensive but reasonably strong shock cord.

A final word about all things elastic—they always lose their spring! Gear should be designed so the owner can easily replace these bits. Again this is often not the case. The good news is you—the informed consumer—can work around these flaws.
Short Hangs
I'm frequently forced to hang my hammock where space is limited. Chickee platforms are one example. In these situations the goal is to approximate the angle and tension of a normal hang. To achieve this I use a skyhook strap configuration as seen here.

First loop the strap somewhere above to take the downward force. Then tightly round the upright to take the lateral pull.
With trees you just shorten the straps as much as you can. With large diameter trees you can force the straps to pull from one side of the trunk—gaining 6-12 inches—which may be enough to make it work! 🙂
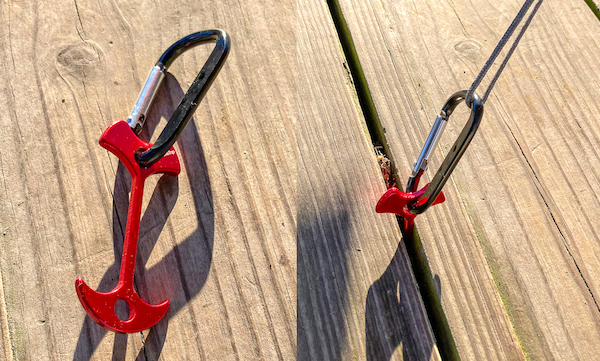
Platforms & Docks
Camping on wooden or other platforms can be a challenge. In addition to short hang situations, how do you tie anything down if you aren't near an edge or upright?! These fishbone anchors are designed to slip between floorboards and provide a solid attachment point in these situations.
Rainflies
As noted above, the classic
rainfly for a hammock is diamond-shaped (a square turned 45°). Most newer hammocks have a hexagonal fly, which requires more lines to pitch properly. Keep in mind that the smaller your fly, the smaller the dry area for your shoes and gear will be. Note that a hex fly is just a diamond with the tips
cut off (dotted lines). I think this is done by hammock manufacturers to save weight.

Many generic square tarps come with additional tie-outs at the midpoints (orange). You can tie-out all four mid-points to get a hex configuration. From a practical stand point you'd probably just tie out one or two in special situations (such as wind-blown rain from one quadrant). See Pitching in the Wind and Cold
below.
If you need to create a tie point, use the pebble trick
(place a small rounded object and wrap the fabric around it, then tie your rope around the neck
of that pocket).
Cliffs and Walls
Sometimes your site will be tight
on one or both sides (cliff edge, rock wall, etc.). In these cases you have to use your imagination and improvise a solution. The top of this graphic shows a weighted fly line hanging over the edge. A water bottle, a bag of small rocks, lashing to a large rock, etc. will all work. But be aware of the balance needed to keep the fly's peak near the centerline!

The lower part shows how to truncate a large diamond fly with a rope parallel to the hammock. You can rig it off the ground (tied between two trees) or on the ground (between two stakes). This is useful if you have to pitch next to a large boulder or other wall-like
structure. I once had to wrap the end of my fly around a tree that happened to be too close to tie to.
Here is another example where I used a flexible green stick as a strut over a cliffs edge. Note that the near corner was tied out to a bush when I was sleeping.
Pitching on the Ground
I carry a 3x6 foot piece of house wrap
plastic to use as a ground sheet in a pinch. (It also comes in handy as a semi-clean food prep area or surface to unpack onto.) Unless your hammock was designed to be used as a tent, the material does not benefit from being laid on the ground! I took this photo the first time I was forced to camp this way.

After moving the heavy picnic tables into position, I pitched my tent. I used my bath towel as an impromptu ground cloth. Notice: a) the foot end is slightly higher than the head (see above), b) the vertical stick holding the netting away from my feet, and c) the eased
rainfly hanging out of the way to the side. This was remarkably comfortable considering no preparation and no sleeping pad!
Pitching in the Wind
The key to pitching any hammock or tent in the wind is tying everthing down and keeping it low! To start with you might lower the entire hammock so your butt is just a few inches above the ground. If you are using a fly, bring it close to the ground on the windward side(s). It is a good idea not to have your head or feet directly into the wind, unless your fly has special flaps on the ends to keep rain out. If you have an asymmetrical fly (one end or side larger than the other), you might try reversing it—putting more material towards the weather.
Pitching in the Cold
One advantage of sleeping in a hammock is it can be very cool in hotter weather. The flip side is it gets cold fast as the temperature drops. This is a big topic so I will just summarize the highlights here:
- Sleeping Bags give little protection from the cold when compressed by your body weight. This is why you need an insulating pad when sleeping on the ground. Using a pad in a hammock is possible, but it can be very tricky.
- Putting on more clothing can help. I like to wear a fleece to bed (since it doesn't compress as much as the sleeping bag).
- I had many cold nights before I invested in a simple Underquilt. It is basically a blanket shaped like a taco. The goal is to suspend it under the hammock but not put much weight on it.
- Since the part of the sleeping bag that you lie on adds very little, many serious hammock campers use an Overquilt. These look like mummy-style sleeping bags with the opening in the back! You don't need much of a back if you are using a corresponding underquilt. This also makes them easier to get into! Overquilts generally have a collar that can be closed around your neck, but they do not have hoods, so wear a hat if your head gets cold easily!
- If your fly is large enough, you can cut down on exposure to cold winds by wrapping the windward side under the hammock to make a sort of cocoon. This is very easy with a standard diamond-shaped fly.
Hybrid Sleeping Bag
Here's an interesting idea—put the hammock inside a standard sleeping bag. The bag has ports
on both ends to pass the hammock thru. It took me a while to figure out how to pitch it properly, but once I did it worked pretty well as far as staying warm is concerned. But because you are constrained by the bag, you can't really sleep off-axis. It was not really comfortable for an adult. Might work for a child?

Know Where Your Towel Is!
One nice thing about hammocks is you don't have to crawl around on the ground. You do on occasion have to deal with your wet or dirty feet! It is always a good idea to have a small towel, cloth, or bandana handy to clean and dry your feet before you hunker down for the night.
Unmentionables
Without going into too much detail… I'll just say it is possible with certain hammocks for men to relieve themselves in the middle of the night—rolled on their sides thru a partially open zipper. The exact details are left as an exercise for the reader. Watch where you put your shoes! 😉
Hanging Examples
In no particular order here are some examples with notes on the issues addressed…
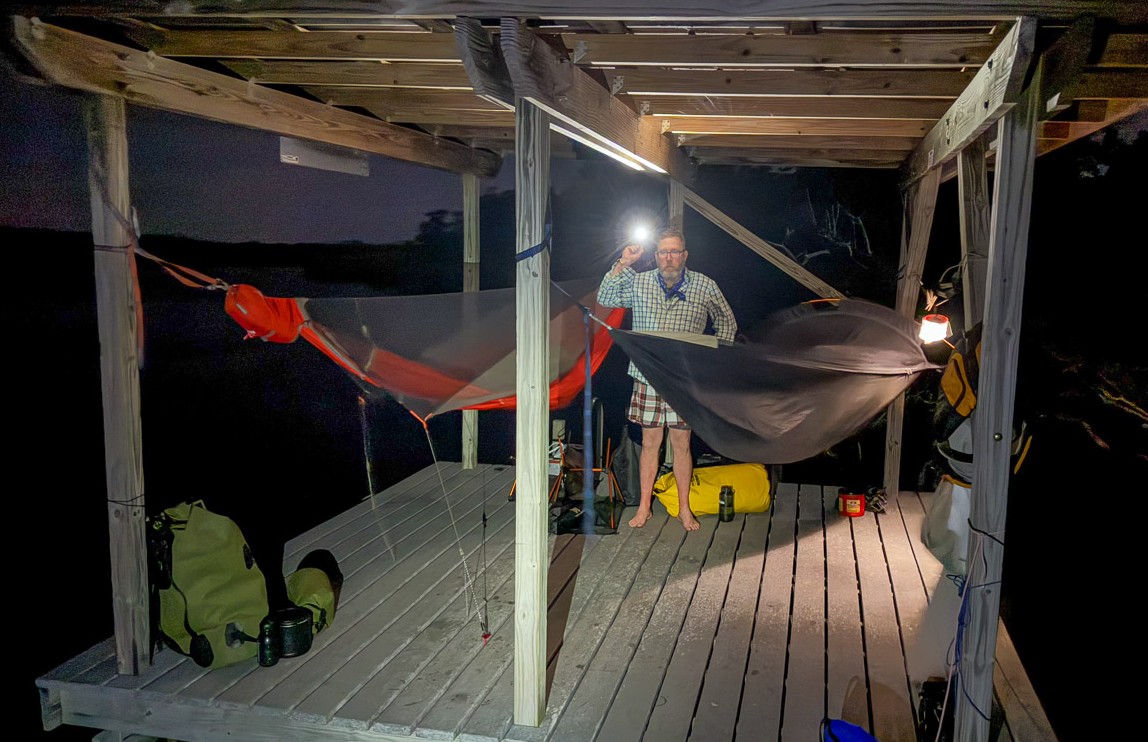
Everglades chickees are 10x12 foot platforms with six uprights supporting the roof. This just barely works for two hammocks hung diagonally as shown here. Every other option is a short hang
without going over and under. One huge advantage is you can hang everything up and then unhook one end to get them out of the way. Note the fishbone anchors to the floor.
I have never had to go through a big rain on a chickee. The nominal roof will only stop rain if there is no wind. I think one or both of us would have been a bit wet by the morning (okay if it's warm). I carry an extra small tarp to make a partial wall if needed. I've only used it once to block an intense afternoon sun.
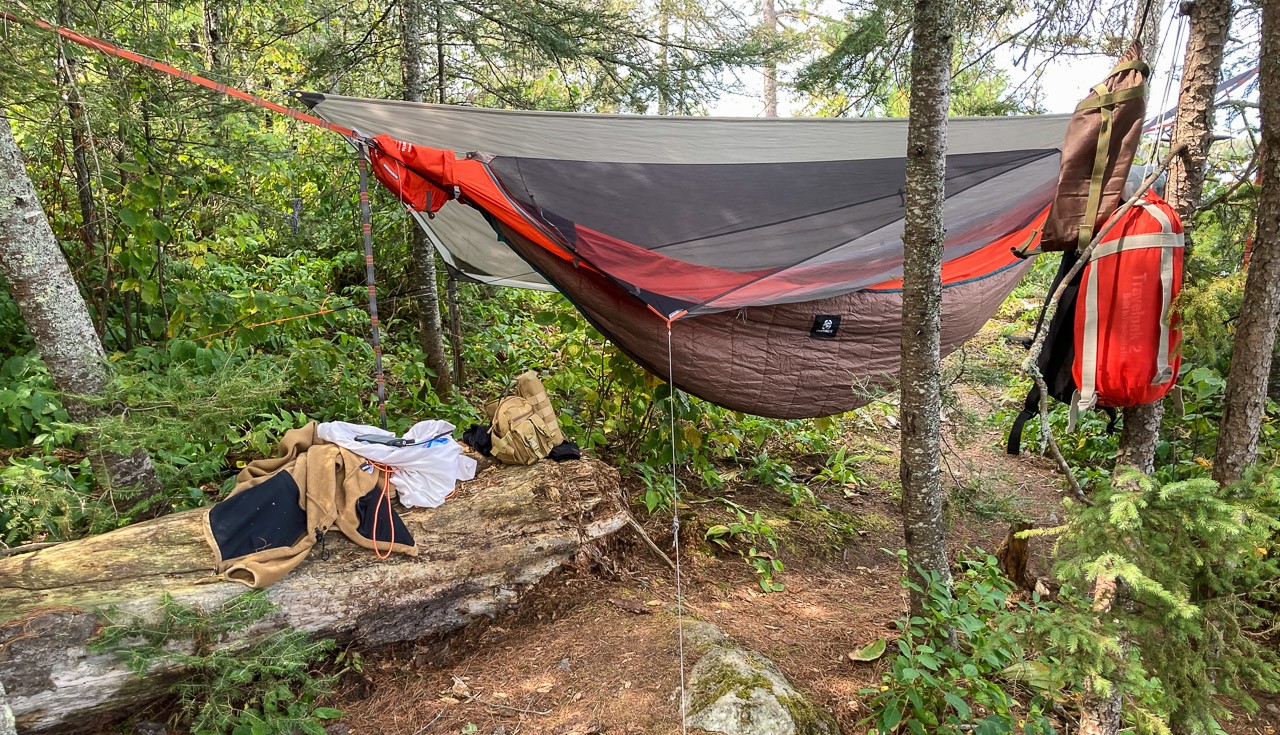
This hammock site was a real challenge, and confirmation of how flexible hammock camping can be. I was pitched over a fallen log and a large rock! It turned out to be a perfect place to weather the storm that blew in overnight! (The rainfly is folded back in this photo. The brown fabric is an inexpensive underquilt I brought to help keep out the cold.)
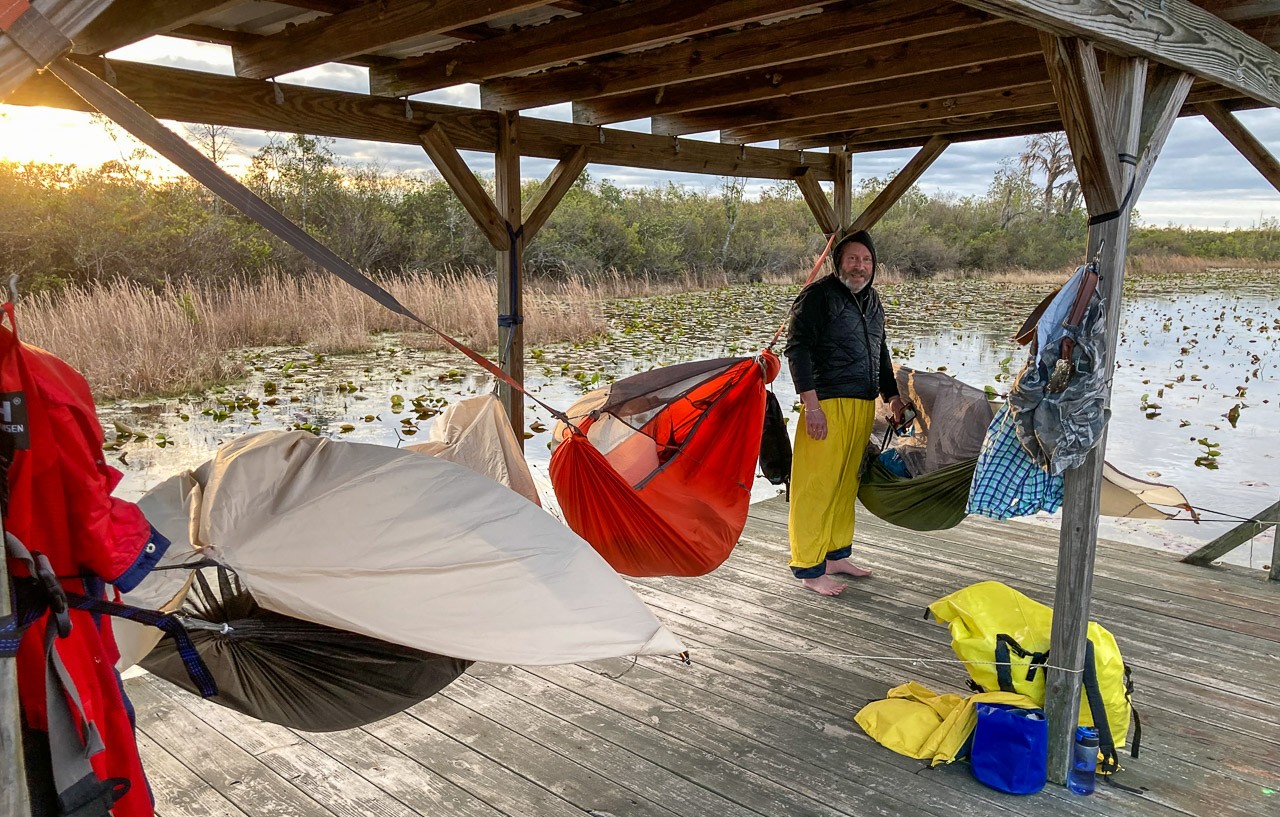
Even this very large chickee in the Okefenokee required some over and under. It was extremely rainy & windy, and we had to pitch our hammocks as it was getting dark. Fortunately most of the rain had stopped by the time we went to sleep.
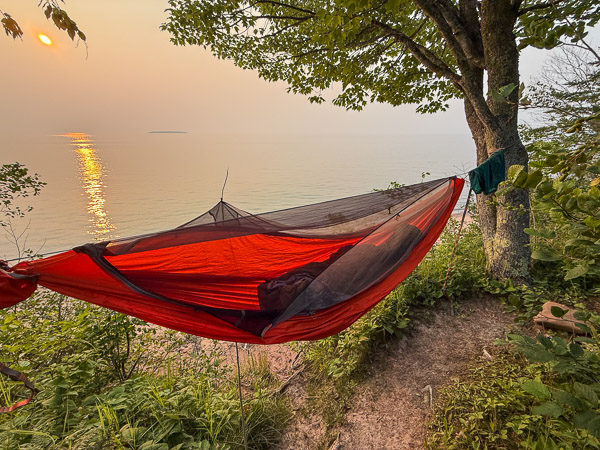
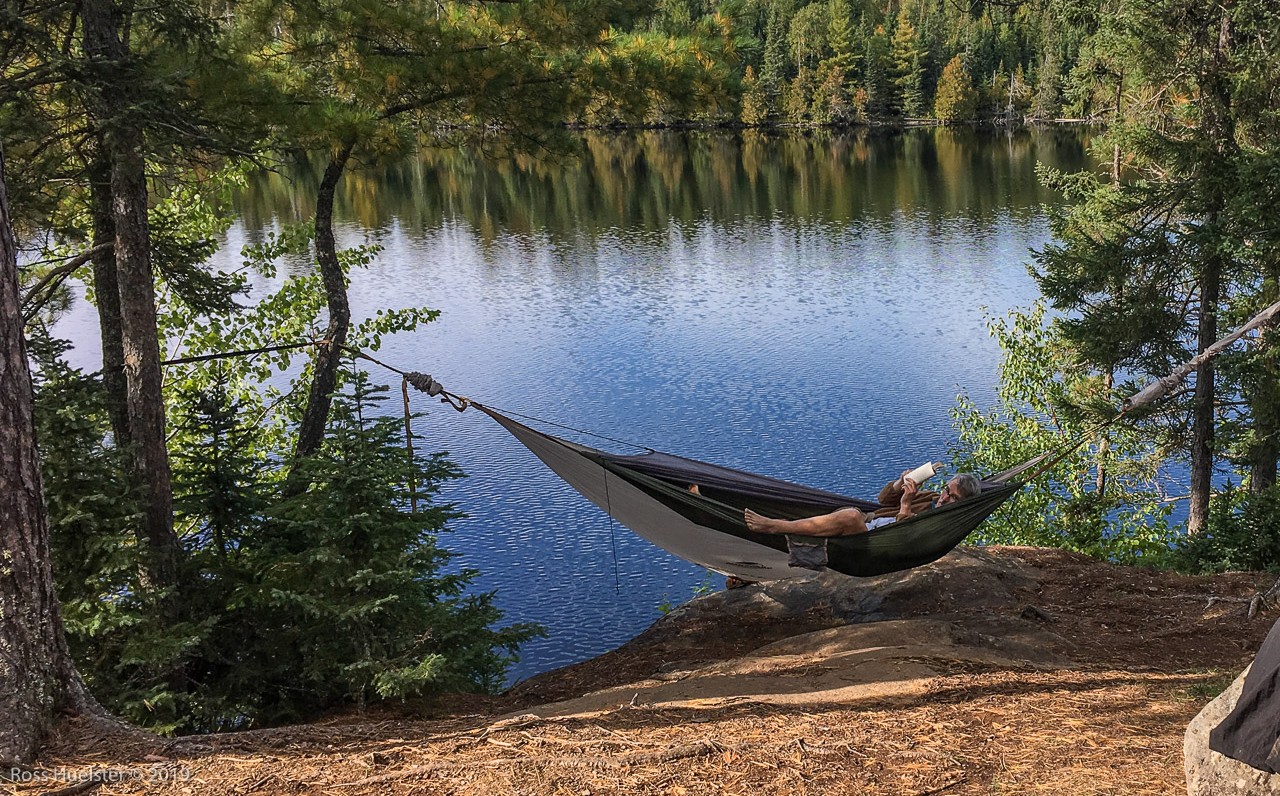
This is one of my favorite spots to hang in the BWCA and a bit of a challenge. The supporting trees are not ideal—too small and flexible. On the left you can see I used a smaller tree as a sort of strut for the strap that continues to the larger tree behind it. It had a significant sag in spite of my best efforts. But what a great spot, eh? Note the fly is folded back and I've unhooked the netting on the head end.
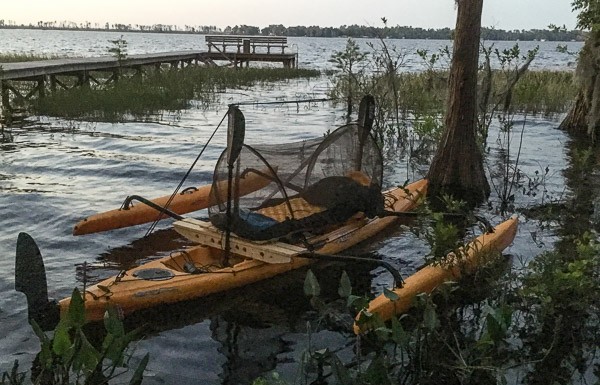
This an experimental rig I cooked up to allow camping on top of my larger kayak. Not really a hang
but it shows how an inexpensive self-erecting
camping hammock can serve as a spacious mosquito net tent on the ground. I call this an experiment because the extra weight of the platform made the boat too heavy for an extended trip with gear.